The Blog of Michael T. Murphy and his lifelong obsession with "little army men" and their imaginary glory, miniature wargaming, and other things...

Wednesday, February 17, 2021

INTLLAB VM-370 Vortex Mixer Review....

 One of the issues most of us tabletop gamers and painters have is the process of having our beloved and often rare paints separating during periods of non-use, aging, etc. Sometimes the paint separates to the point that all the shaking by your hand and stirring doesn't seem to do the trick.

Plus the fact that mixing paint by hand shaking usually really doesn't do a decent job on pigment allocation and getting things properly mixed.
One such fix for this is a paint mixer.
There are a variety of these on the market, but in this case, I am going to review this little baby I ordered off of Amazon.
I had seen numerous posts from people on various Facebook pages talking about Vortex mixers and during my research, I had narrowed it down to two different models. After more research, I went ahead and dropped 60 bucks on Amazon and within a week had this at my doorstep.

INTLLAB Vortex Mixer VM-370

Before we begin, if you don't know what a vortex mixer is, well...it's a piece of laboratory equipment that is used to properly mix laboratory samples and vials quickly through the use of high speed rotational vibrations.  

So the box arrived:

Easily labelled and no damage....this is good....


Opening the box, we see the item, (note. This is NOT the way it was packed. I took the unit out and looked at it, and then repacked it into the box. The cardboard damage, etc. was from me.


The unit consists of the mixer itself along with a power unit, a small card of instructions, and that's it.
The power unit plus into any outlet, and then into the back of the unit itself. 
The upper housing, (mix area), of the unit is rubber, while the lower half is hard industrial plastic with a nice identifier label on it.


Unit with the power cord. A simple enough setup, even for me...

The base is flat, but there are no real grips to hold the item onto whatever surface you place it upon. An idea I have for the eventual future will be to figure out where it is going to go and drill three small holes into the mounting base and run securing screws into it and the table. This will keep it still and in one place while in use.

Let's try it out!...

There is no "on/off" switch. The unit is activated by placing the item to be mixed down upon the small circles where it will automatically begin a high vibration. 
The first thing you have to remember is that you DO NOT hold the paint container, (pot, jar, eye dropper bottle) in a death grip. You hold it with a slight firmness to keep it in place. I learned that with eye dropper bottles it is best to put them at a 45 degree angle. 

So here we have some pics and video of yours truly testing it out. The video is approx 1 min long as I try different containers, and I run the Vortex to mix the container usually on the bottom and the top.

The first main test was with a pot of GW/Citadel "Nihilakh Oxide". (Please note that during the video the unit stops frequently. This has nothing to do the the VM-370, but has to do with me "learning" how to hold the paint pot on the mixer properly.)...


And awaaaaaaaaaaaaaayyyy we go!!!


After that was the end results...

Wow! Really well done!


Next up was an eye-dropper of Reaper "Tropical Blue"...
Same procedure, but you can see that the pigment has separated and comes out initially as "clearish"...


Oh dear, this is NOT good.  Note: The white and brown are "before" and "after" shots using Vallejo "Natural Wood" with the VM-370...


Unfortunately the videos I took are way too long for Blogger to handle, so I will post the results pic here.

You can see the results!


And last try, is with an oooooooolllllld container of Reaper Pro-Paint Copper...

Before the mixer.....YIKES! Is this still even any good?


And the "After" the VM-370...And yes, it is STILL good!


A helpful suggestion is to also add 2 3mm or 1 6mm glass agitator bead to each paint pot. Please do not use "stainless steel" as they can rust, (if the coating on it goes away), and FOR GAWDS SAKE, DO NOT use "bb's"...or you WILL get rusty paint.

And finally I was able to actually finally properly mix up this ANCIENT bottle of Armory Tibetian Blue that I bought in the mid 1980's and is still good! (It's the last one of my Armory paints still working)...


An oldie but a goodie...


If anyone is out there that would like to see the actual videos of this things (the ones that are too long to post) and see the full before and after operations, let me know and I can post it on youtube for you.

Final Analysis:

The VM-370 is a sweet little machine. It's learning curve is essentially 10 minutes of learning how to hold the paint pots properly on it to get it going and give it a good mix. After you learn that, it's easy peasey. The only suggest I would have is to mount it somewhere so you don't have to worry about the unit slipping while using.

Thanks for checking this out and as always, comments, and questions are appreciated!
More to come!

Sunday, February 7, 2021

Feb Update...Pens, Painting Room, Rules, and Such...

 As January is now in the past, and Feb is upon us, I am seeing the "nearing the end" for the current game room setup.

The game shelves are pretty much done. So the checklist for the game room to be finished has had one major block checked. The others are as follows:

  • Tables and chairs for the game room: (2 8' x 3' ft folding tables, and one 4 foot table for an end table should be good enough for now. Chairs should be folding with padded seats and made for "heavier" weights.)
  • Additional overhead lighting. The current lighting doesn't do the game area justice, so I am thinking of installing 1-2 hanging shop lights. I just don't want the fluorescent glare, so it might be LED.
  • Small curtains. Yes this sounds weird but I like the idea of having the windows with black curtains on them as it lends a better overall look to the place. Plus it helps with light discipline.
  • Display cases. Since the IKEA nightmare, we are in the market for display cases. Right now things aren't looking good on the used market, but we will keep looking.
  • Sofa: Future plans include a black leather sofa for the "lounge area" of the game room.
  • TV/DVD player: The wife has decreed that I shall have a TV and DVD player down there. That will help fill the inset.
  • A larger trash can. The current one isn't cutting it.
As the game room is slow progress this will cost some money, so it's a one step at a time purchase.
The biggest issue being the display case(s). These things cost more than TV's or leather sofas!

Pens!

So,  I'm taking the deep step and getting into using Pigma style Micron Pens for detailing work on figures. The biggest issue with these is finding the right pens that do not "run" when the final sealer coat is put on, and after a lot of research I went ahead and ordered some.

A 3-pack of various tip sizes for a decent price.

The price from Walmart.com wasn't bad and if they work half as well as I have read, then the results should well justify the small price. Hopefully I will be able to see how they work out in the near future, and getting some pics posted here to show.

Rules:

While digging through my "boxes o' stuff" I was lucky to come across two sets of rules that I "knew I had somewhere"...
The first is my AWI Rules, "Patriots and Loyalists".

"Yankee Doodle went to town......"

It's an older set of rules and one that I do look forward to trying out.

Speaking of old rules. So the AWI isn't your thing? Would you rather be spending your day crossing the hot burning sands? Then say no more!

Zut Alors! Honh Honh Honh! (or something like that...)

This set of older rules lets you command legionnaires and do all the sorts of things that FFL men do...march in the desert, fight the Arabs, deal with sadistic commanders, and die of heat stroke....
Naturally I am short of Legionnaires so I guess I will be ordering some soon.

Also in a quick sale, I was able to also purchase this....

Gonna throw down like it's 1985...

I'll admit I have always been a sucker for good NATO vs WP type stuff, but I also like the realism of the looks on the table. Hence why BF's TY "tank park" stuff doesn't do it for me. I've wanted to get a copy of these rules for a while, but they've eluded me until a friend of mine gave me the opportunity to get them.
So looks like I'll be rebuilding my micro armor force...Hooah!

Back to the Painting Room:

So in the previous post I had shown off some of the painting area.
As promised here are some more pics showing the painting room in it's current stage, (I say "current" because it is going to be a constantly changing thing I think)....
One of the issues I have is with mats, ground cloths, etc., and the storage issue. Thankfully I was able to "improvise, adapt, and overcome" as the overhead piping (remember this is a basement), allowed me to rack the tube items, keeping them handy but also out of the way and nicely stored.

My "tube rack".  Now I just have to label the tubes so I remember what is in them!


Also, as promised in the painting room, here are a few more pics of the layout.

As right behind the door is my small bookcase. This holds a wide variety of items, including my Ospreys and old Squadron Signal books, some military FM's and TM's, some binders of notes, etc., two massive stacks of WI, (yes I have a subscription), my "Cylon head" art project from high school that my mom kept, some other knickknacks, my "Batman" Halloween Trick or Treat bucket, and finally on the top shelf, is "The Bongolesian Victory Arch", a Dreamsphere, and my UFO cookie jar, (which last saw major use in 2001 at my Elvis Themed Christmas Party)....

It's amazing the strange stuff that we as humans seem to collect....

And on the side is the chest of drawers, (for holding miniatures), and the dresser, (for holding miniatures, sculpting and molding supplies, model kits, etc.). You can see the tubes previously mentioned in the rack above. On the dresser are some of the projects I have in the queue to be painted up and finished. The storage containers to the right hold plastic, wood, resin kits, etc.

This painting area is looking disturbingly neat for a tabletop wargamer...


On top of the chest of drawers, I have my Robert E. Lee on Traveler statue, (a wonderful housewarming gift), "Penny Pig", (she catches and gobbles up all the spare coins), "Poe" my skeletal raven, my Alfred Hitchcock bobble head, (I need to get a Colonel Klink one also), and a vinyl Disney "Beast" figurine, (eventually to be painted up as a large statue).... The picture was a birthday gift from a special person many years ago. It is called "An Enchanted Evening". The glass was cracked and I need to replace it. Just one of the many things on my "to do" list.

An interesting menagerie indeed.


While setting up things, I noticed that next to our family pictures, the two most common individuals portrayed in our house are 1: Jesus Christ, and 2: Robert E. Lee....
Elvis comes in third...

Now that the room is pretty much organized and done, (still waiting on the Chair and the floor mats to be "completely complete", I can start paying attention to what I have put down in the queue.
In this pic there are various pieces of scenery (buildings mostly), as well as vehicles, and troops. Most of them are 15mm, however there is a 28mm Tri City Laser Western building that needs some work to be finished up in the upper right corner. I still need to get my 28mm project stuff out.

A frontal full-on of some of the "Stuff" that needs to be done...

And a side shot...


And on the day I started this entry, Wally World delivery came through and delivered my new self-healing painting and cutting mat!
This one is reversible and larger than my last one, and will allow me a larger work area.
If you don't have one of these, you really, REALLY need one. They are that good for the work table. I ordered this one from Wally World and the price wasn't bad at all for it's purposes.


And since the game-room fridge is starting to get low, it's time to restock!

Time to refill with tasty drinks!

Okay, that is it for now.
The next post will be a review of my recently arrived VM-370 Vortex Paint Mixer and more!

See you then!

Thursday, January 28, 2021

January's End...Painting Room is finished!

 As January comes to a close, the work on "The Man Cave" continues, but the primary work is winding down. 

Most of the gaming boxes have been moved to their respective areas, and the unloading and setting up is still going on.

However, I wanted to share with you, a (mostly) finished objective.

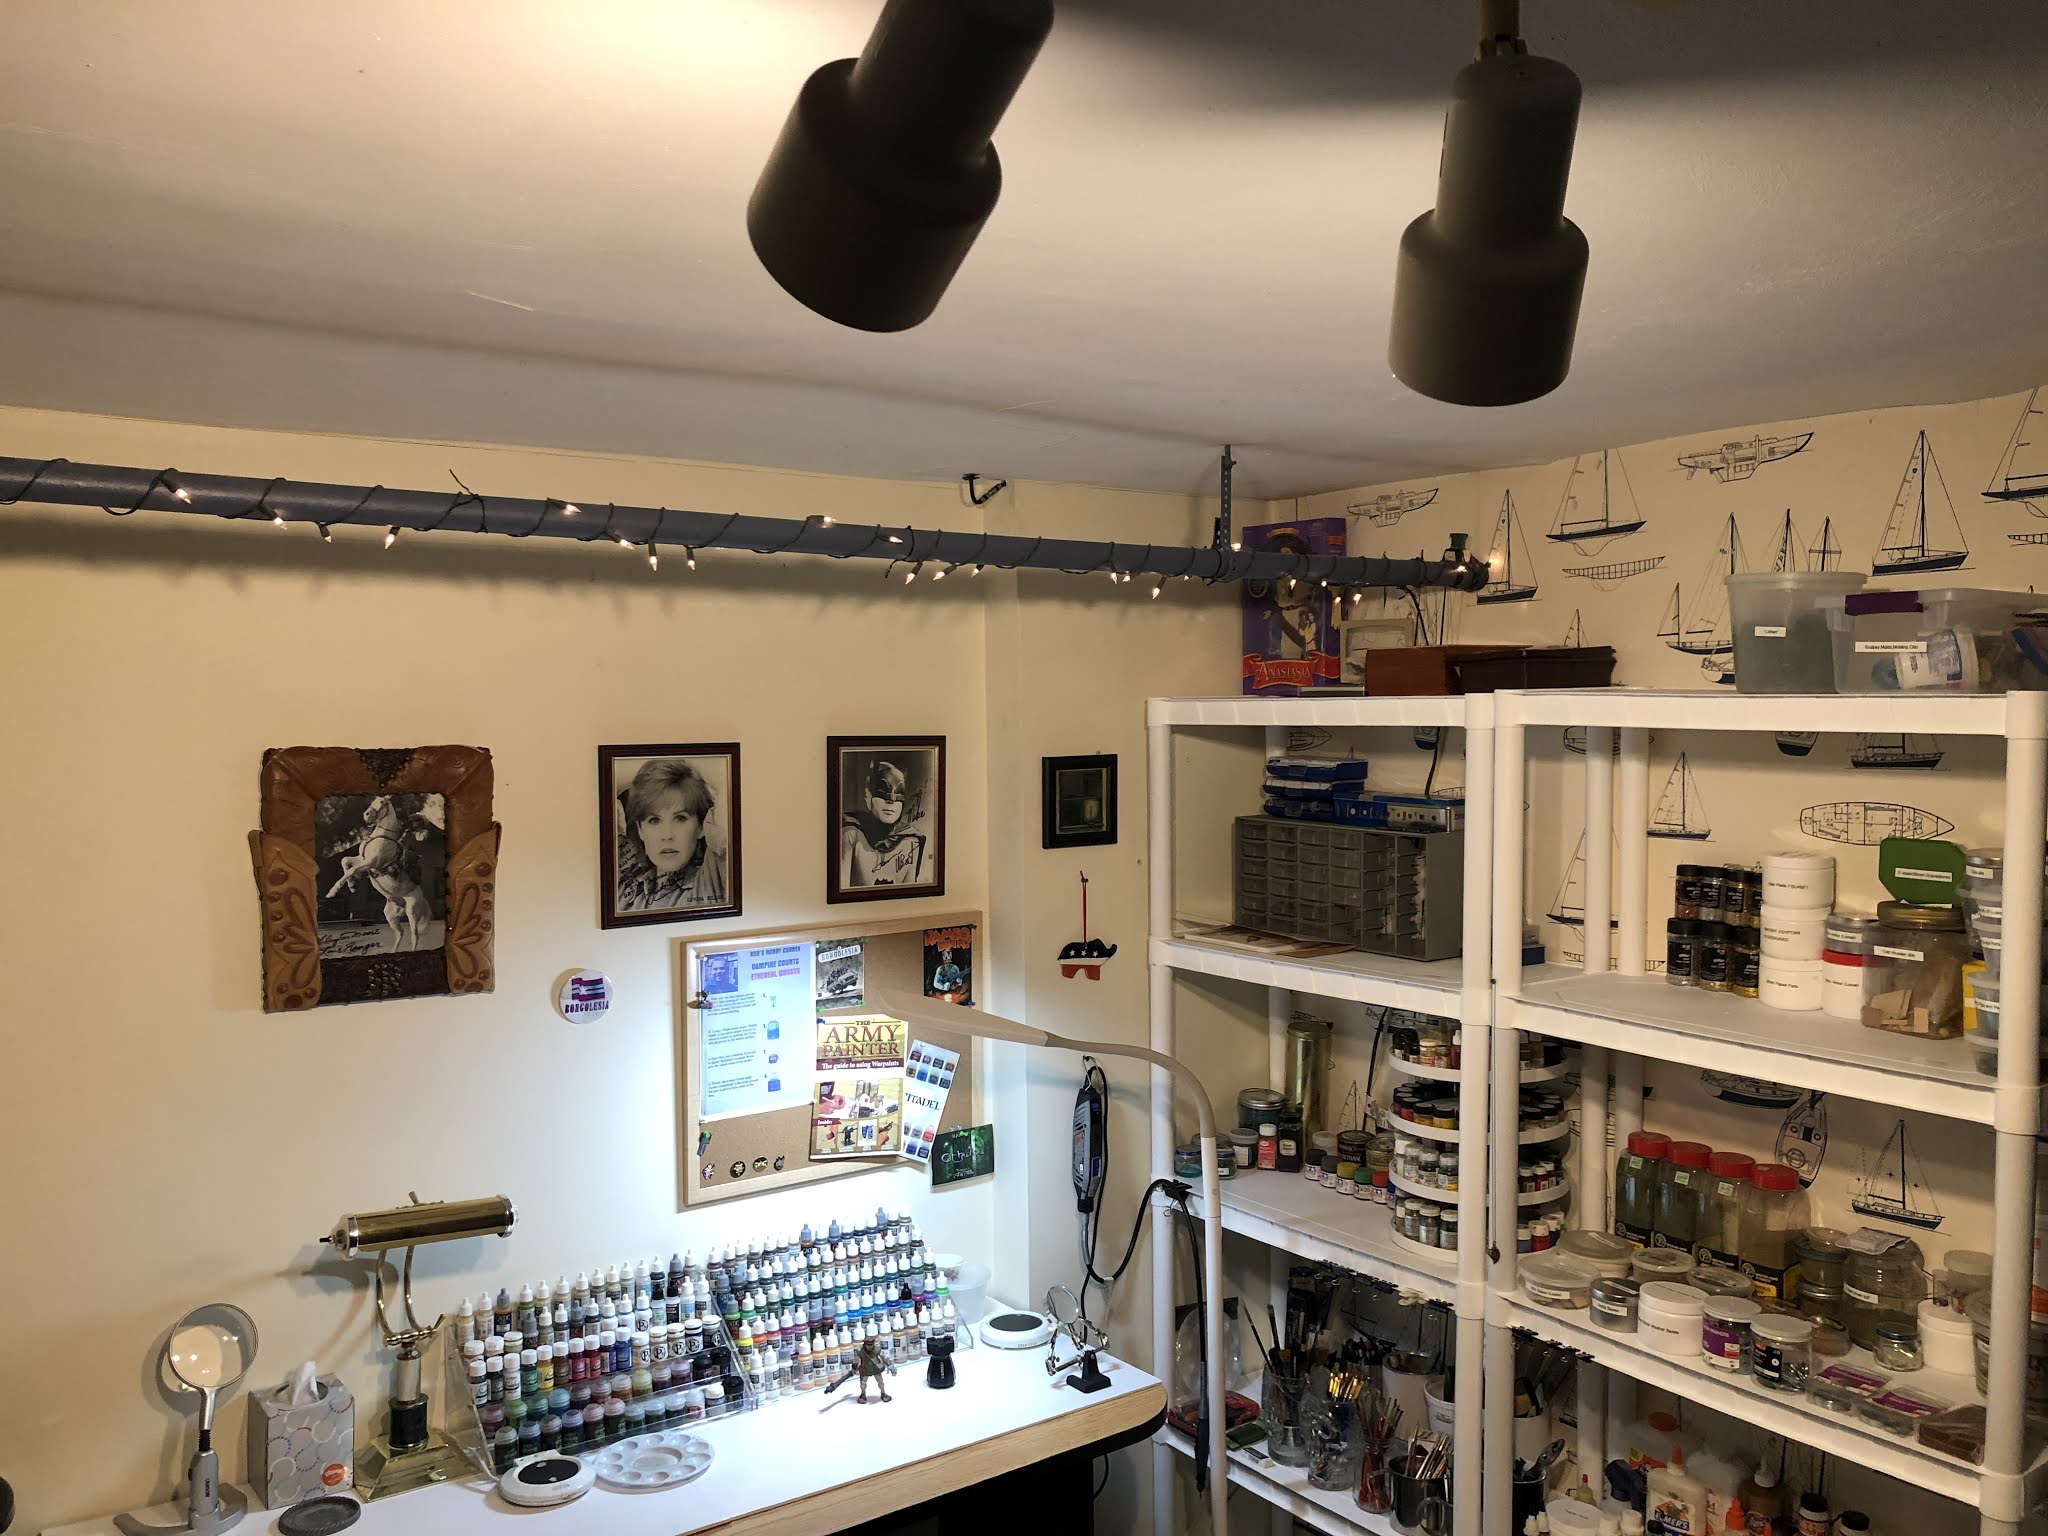
The Painting Room/Work Room is essentially FINISHED!

Bedroom #4 is in the basement and has become part of "The Man Cave".

The room is 12 X 12.

Here's the current setup for what you see when you enter...


The entrance view to the Painting Room, (minus the chair, floor mats, and trash can.).


The room with the overhead lighting off and just the lamp and fairy light illumination.


Here's another view showing the shelving units right next to the desk.


To the left is the project queue table, with my "Crafts" paints in containers below for easy access.

The table itself is protected by two sheets of foamboard, which will have a third piece cut and attached to protect the bottom edge of the table. Currently on the table is an illuminated table magnifier, a bankers desk lamp, two 5 shelf paint racks holding my eye dropper bottles and paint pots, two cup warmers (one for paint water and one for coffee...on opposite ends so I don't have any "accidents"),  A table magnifier with clamps setup to hold items in place, my palette, and a GW figure holder. Standing guard on the table is an old OOP late 1980's Citadel Hill Giant.

Lighting for the room and for painting is supplied by two overhead adjustable track lights (LED 120v 14w bulbs), as well as an OTT floor lamp and the bankers desk lamp.  Future plans include 1 more OTT desk lamp.


The Shelves:

To the right of the painting desk is the shelving units. Each of these is a standard 5 shelf PLANO setup from Wally Word. #1 on the left is set up for tools and paints, while #2 on the right is set up for groundwork, bases, glues, etc.

Right between the table and the shelves, I have attached my Dremel. This way I can access the Dremel, and the accessories easily.

Let's take a closer look at the shelves shall we?

LEFT SHELF:

Shelf #1: The top of this shelf holds some miscellaneous items in containers, (cigar boxes, etc.), and my daughters Anastasia birthday doll that she didn't want when I gave it to her.

Shelf #2: This is my Dremel shelf. All Dremel tools and accessories (as well as instructions), are kept here.


Shelf #3 and #4:

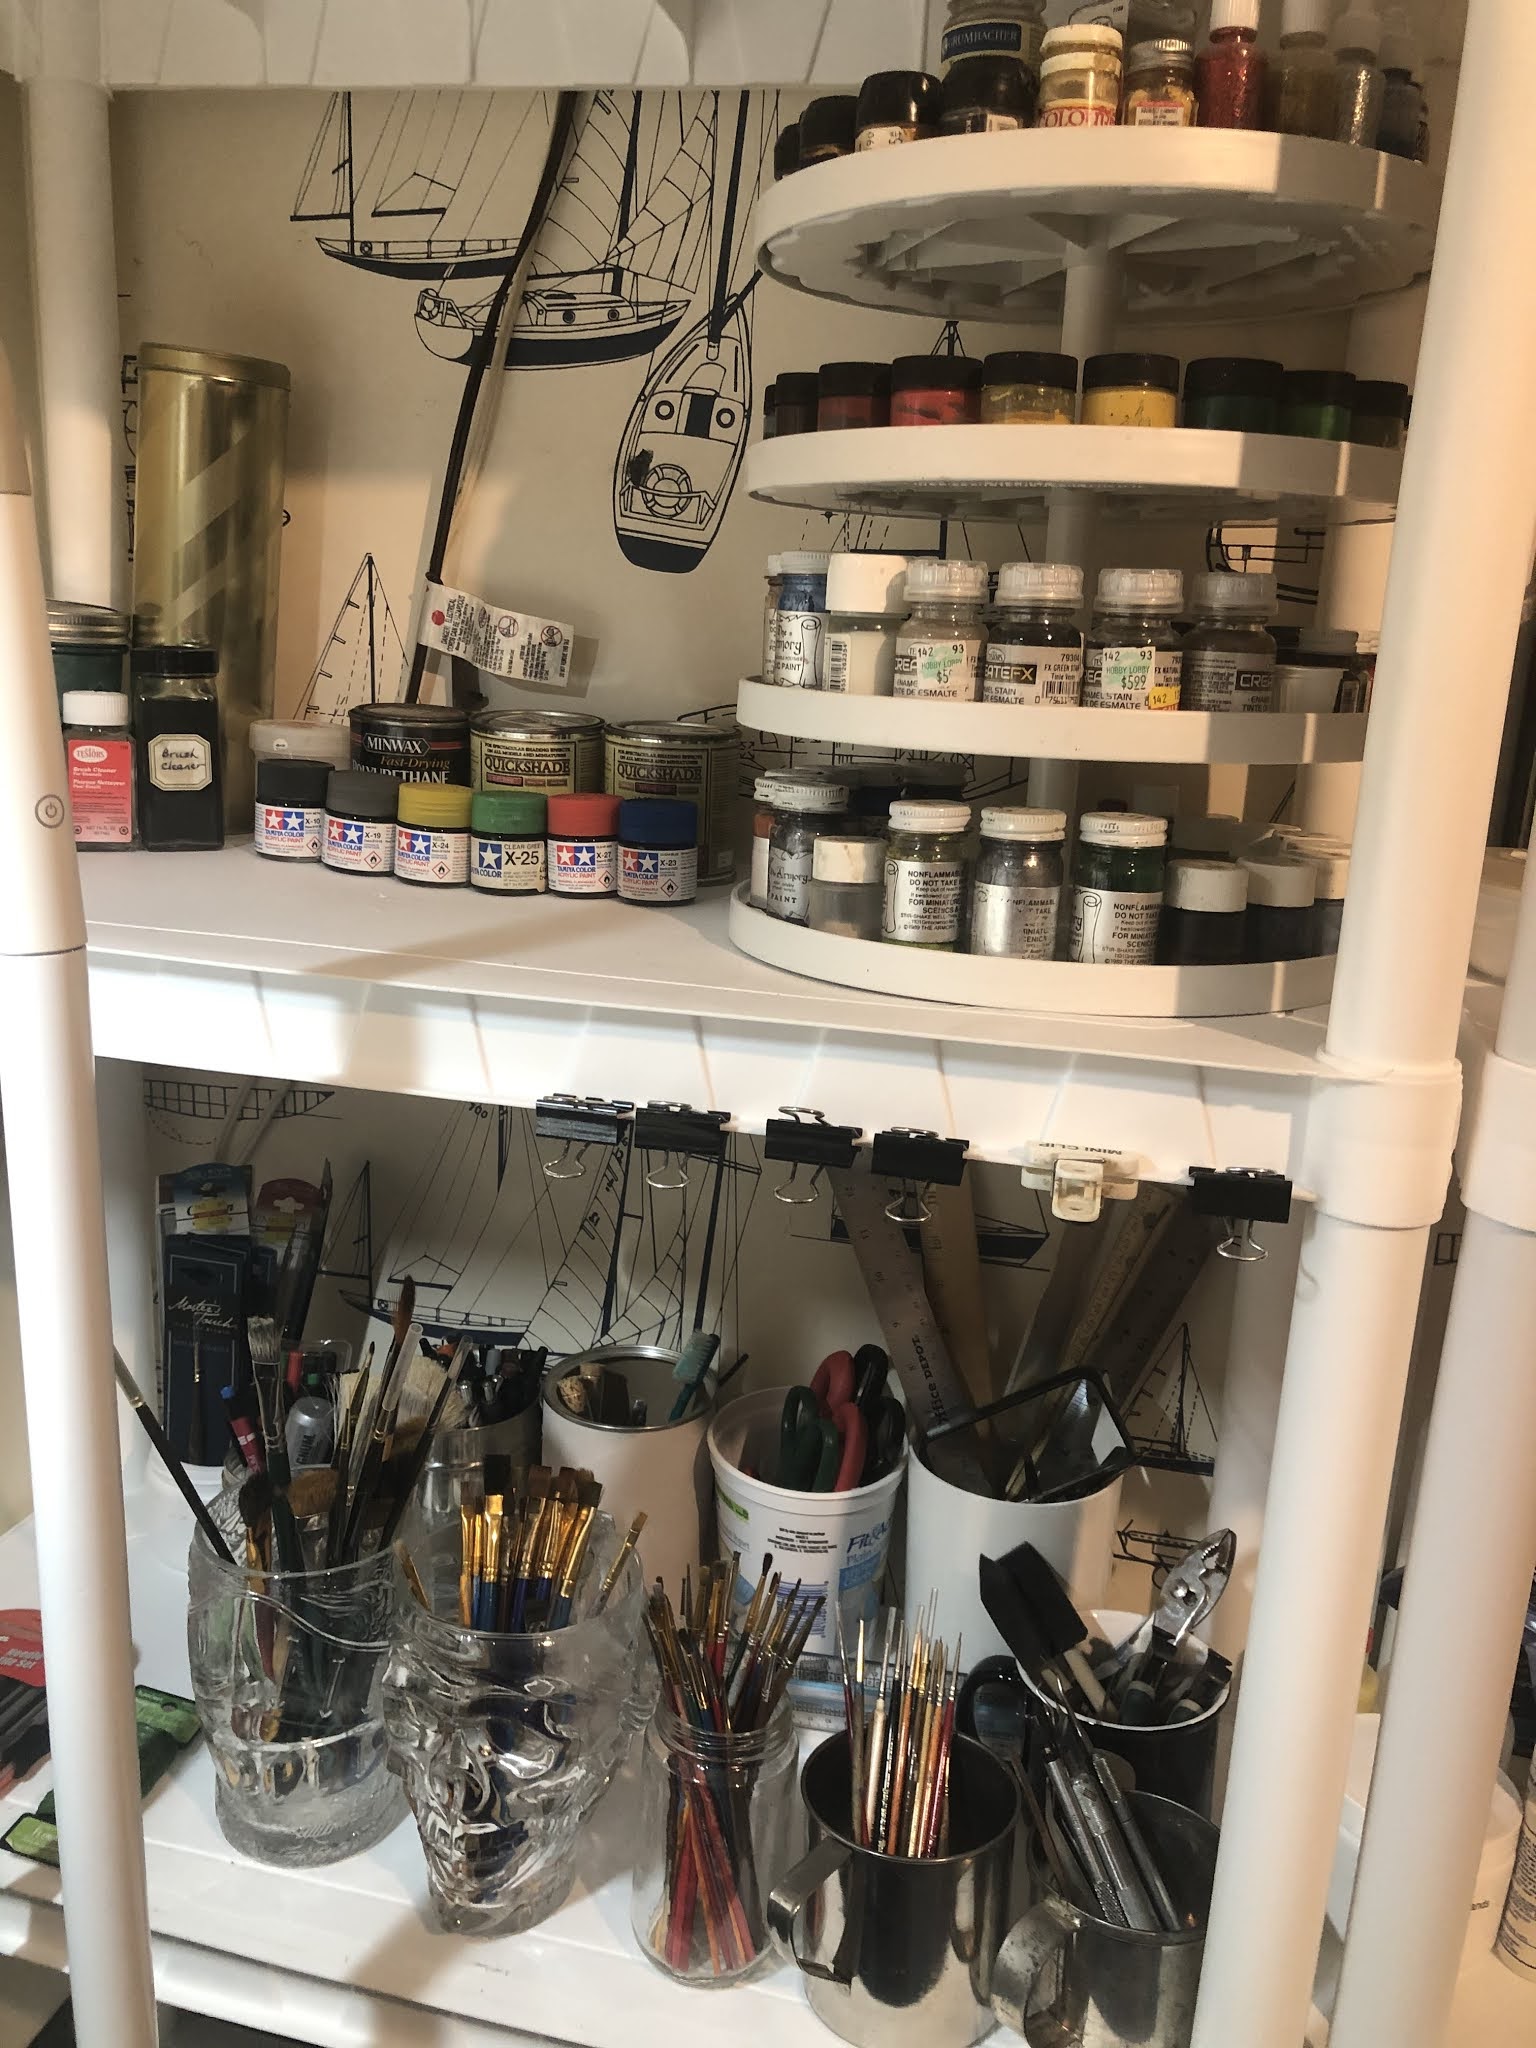
Shelf #3 holds my Paintier 80 that my wonderful wife (Gawd bless her!), got me back in 2010. as well as some other paints, thinners, mixes, etc. This shelf is dedicated solely to paints.

Shelf #4: Brushes and tools. Brushes are separated into (from L to R): Large/General Purpose, Large/Medium, Medium/Fine, and Fine/Extra Fine for detailing purposes . The two glass mugs are from Las Vegas's Excalibur Medieval Jousting Dinner Show and the Pirate Show from Treasure Island back when it was "Treasure Island" and not just another cookie cutter strip casino like it is now. Rulers, tools, pens, and markers all have their respective containers now. 

Shelf #5 hold my magnifier headset and my label maker.


RIGHT SHELF:

So with the right shelf, I got a little "anal retentive" with the label maker.  I had so many containers of "stuff" and I needed to get them organized. You see my wife has this weird philosophy of "A place for everything and everything in it's place", which kind of goes against the chaos of wargamers, but I decided to go with the flow because that was indeed one of the biggest issues with my work area.

Shelf #1:  Holds a container of Lichen for groundwork, as well as molding supplies.

Shelf #2: This shelf holds various forms of glitter (don't ask), as well as varuous labelled containers of parts and pieces as well as labelled containers of loose figures. 

Shelf #3: This shelf holds my groundwork, turf, stones, and all of my basing materials as well as my different bases in labelled organized containers. 


Helping to keep things organized...what madness is this???...


Shelf #4: This shelf holds all of my various glues and sealants, and sticky things for basework, etc...


Shelf #5 holds storage containers of wood and plastic for projects as well as the massive amount of Plastic-struct supplies I got when a game store was going out of business.


Oh and above the painting table is my cork board for references and my autographed pictures.

Painting References and Inspiration, all of it is right before my eyes...


On the board, below my P-38 can opener, is "The Good Idea Fairy", spreading "inspiration" everywhere...


My autographed pic from the late Adam West. Truly an interesting gentleman to say the least...


My autographed picture of the Late Clayton Moore...the best and only "Lone Ranger", EVER..


And of course, the "Goddess of my painting table", the ever enchanting Ms. Linda Blair...*shiver*...


There's a lot more things to show you in the paint room, but I think I will cut it short for now.  The game room continues to be a project but that too is coming to a close.
And now...it's time for a cold one!!!

Cheers!

Stay tuned for more!!!

Monday, December 28, 2020

End of Year Update

The month of December is closing out, so I finally decided to get off of my butt and update the blog one last time. 

So what did I do gaming wise this year? Not very much.

1: I participated in the Bones V KS. 

2: I picked up a couple of pieces of scenics.

And that's about it.


I didn't do any real gaming, as this year has put a massive crimp into my life. 

The first two months were spent mostly in Physical Therapy trying to teach my right leg how to walk again. Then the Pandemic hit. 

And we bought a new house due to the rising taxes and crime in our neighborhood. Wife and I wanted a "fresh start", so we well...bought a house and moved.

But the house does look beautiful in the winter. We got the first snow right about the 16th of December and I took some day and night photos of the place and it's stunning...


The Lord has indeed blessed us with this house...

One of the things I finally got a chance to do was to get the much wanted IKEA Detolf Display Cabinets for my miniatures.
Due to the COVID issues, stock for these were at an all time low. So imagine our joy when the two we ordered finally showed up!
So on Saturday we began to assemble the first one. Yes it is a two person job. We had the box open and in 30 minutes had the base and holding frame assembled.
Then it happened.
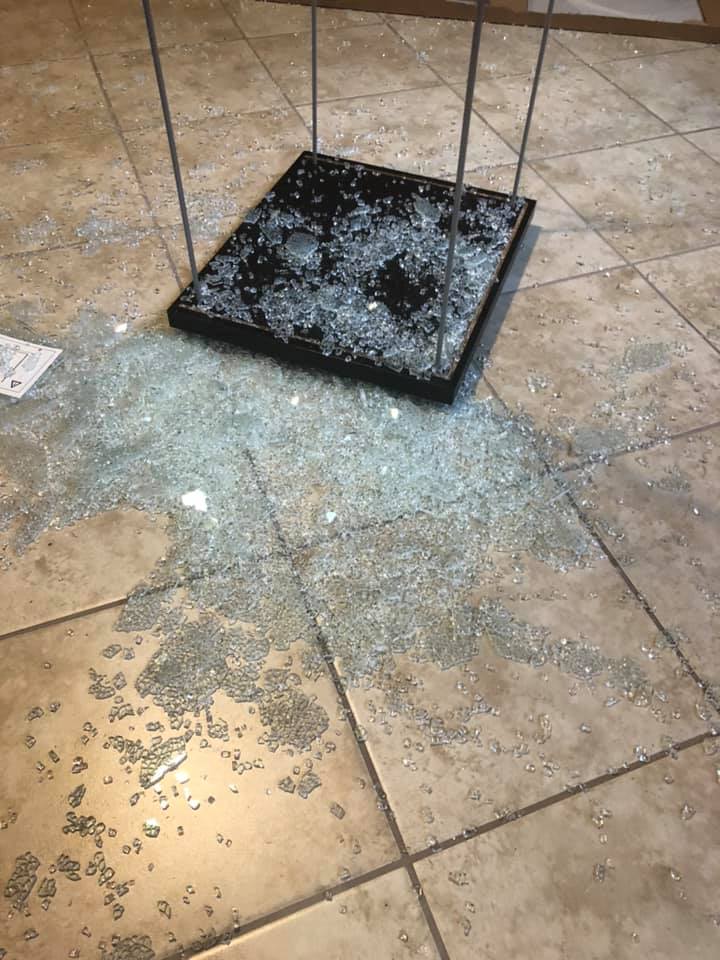
My wife was holding the glass side panel in her hands, when suddenly the panel exploded in her very hands, covering her with bits of broken glass, and scaring both of us.
After checking to see if she was okay, I checked the area and took pics of the incident. The pile of glass on the floor was where my wife was standing.  A quick check of "Ikea Detolf exploding" on Google, shows this to be a VERY common issue with these units going as far back as 2014-2015, with no apparent fix by IKEA.
So today I began the process of the refund/exchange process. Rather than even try to work with the second unopened item, I am returning them for a refund. I will save my money up and get better quality cases that won't explode in my wife's hands and shower her with glass.


So you can see what I have to say "No...I don't things that will explode simply because someone is holding it." 

So the setting up of the man cave (paint room and game room) continues, and hopefully will be done within the next 1-2 weeks.
After that I can start up painting and building, and gaming again.


Our 2013 Tree...

 So this is Christmas...and the end of the year.....

The end to 2020 is in sight and we can see 2021 and it's surprises looming ahead of us. What shall it bring?

For myself and my wonderful wife, (Gawd bless her!), we hope for all better things.

2020 hasn't been a good year for the majority of the country or the world. Here in the US between an election fiasco, and talk that sounds very much like South Carolina in 1861 as well as the COVID Pandemic, it has touched a lot of lives. 

2020 has also reminded us in a dark way to be thankful and appreciative for what we have, instead of whining all the time for "what we want."

I'm hoping that 2021 will be good to you and yours dear readers.

See you next year!